Showing posts with label pattern. Show all posts

16 November 2013

Diagrams

I've known how to crochet for 17 years. My Nana, whom I love very dearly, taught me how to make basic stitches. I never really did anything with it until nearly ten years after she taught me those stitches, though, and even then, I was very stubborn. I did not want to learn how to read a pattern. It was not until I moved out on my own that I learned how to do so, as I no longer had her wisdom at my disposal. I quickly latched on to the jargon and abbreviations commonly used by pattern authors.

A few years after figuring this out, I saw something very adorable that I wanted to make. The problem? There wasn't a pattern. Only a diagram. This was about 3-4 years ago, and I, in all my stubborn glory, was too lazy to learn how to read the diagram. It seemed too confusing.

I mean, look at this nonsense.
For the past month, however, I have had a ridiculous obsession with crocheting snowflakes. I do believe that literally everyone on my gift list will be receiving one this year, just because I really, really do not want to make anything else. Luckily, there are a plethora of snowflake patterns on t3h interwebs. However, I ran across the same problem I did a few years prior.

The cutest of snowflakes were (of course) written in Japanese originally, but had diagrams included in the free patterns. (Have I ever mentioned that "free" is my favorite four-letter word?) It didn't help that the website where I found these diagrams via Pinterest is written in Russian. I don't speak either of those languages! WHY couldn't it be in some other language that I could figure out? Remarkably, most German is so similar to English that I can figure it out. Italian and French are likewise close enough to Spanish that, using the bit I know of the idiom, I can figure them out, as well. But, no. It has to be in Russian.

Looking back, I'm really appalled at my failure to think of using Google Translate. Sigh.
So, I set about remembering how to read the diagrams. Just as when I finally learned to read patterns, I found that not only was reading diagrams surprisingly easy, but there are SO MANY benefits from doing so, and therefore so many reasons I love reading them now. Here's a list of why:

  • You can see where you are in the pattern much easier than in a written pattern.
    • Only 2 of these are from a written pattern.
      Can you guess which ones?
    • Instead of reading through lines of text to remember where you are (since you can't keep your finger on the page while crocheting), you just have to remember where in the picture you are. For many, like me, this is much easier.
  • You have a clearer vision of the big idea.
    • I like to change patterns slightly to suit my style and the taste of the recipient. By seeing where I'd like to change the pattern in a diagram and how the author accomplished what they did, I can make better decisions about the best way to go about my changes.
  • Diagrams break language barriers into tiny little bits of dust.
    • Seriously. I. Cannot. Read. Russian.
  • They often make prettier patterns. 
    • This obviously is not always true, hence my use of the word "often." However, I seem to like the products from the diagrams better.
By the way, I do plan on making a nifty little chart in the near future for reading diagrams.

Written pattern or diagram: which do you prefer, and why?

Happy Stitching! xo

09 October 2013

Owlghan: joining comments & granny pattern

Hey, awesome you!

This post is two-fold. There is a review of the joining technique used, as well as the pattern for the filler grannies that I created.

I have never in my life made an afghan in which joining was required, but when I saw these cute little guys wandering around on Pinterest, I just thought they were so adorable, that an afghan HAD to be made with them!!


The pattern for these adorkable little darlings can be found on a blog called "Repeat Crafter Me." Please click on the image above to go directly to the pattern!

There was no getting around it. I was enchanted. An owlghan. How cute, am I right? Now that I'm closer to being done with the afghan . . . well, I'm just honestly not sure that I'll ever make another afghan in which joining is required again! Don't get me wrong, it's certainly not the joining that was a pain in the neck. Honestly, it's getting the edging right, but I'll focus on that in another post later this week.

So, the first thing I did was pick out the colors I wanted to use. This afghan is for my 4-year-old daughter, so pink and purple just had to be in the mix. I'm in love with everything sage right now, so I threw some of that in there to add some contrast. The colors together remind me of a fairy tale.

Confession time! I did not make a graph for how many squares I would make before I started making them. Don't judge me! I had a valid reason for not doing that. There's a madness to my methods.

I wanted to see how quickly and easily I could put the owls together. I'm a fast crocheter, and I'm not all that patient. So, sewing on buttons and making beaks and feet on top of the normal crocheting? Eh. Making a ton of owls did not seem like my thing. I don't mind the little nuances of adding and decreasing stitches, sewing parts together, and sewing embellishments on so much when I'm making a stuffed animal, because they're normally pretty easy and quick to make, but a ton of monotonous little owls? What was I getting myself into?

Luckily, the pattern for the owls really is fairly quick and easy. Naturally, as well, I cheated a little bit and used a larger hook size than the pattern calls for. I still didn't want to make that many owls, though, so I made up a filler square to go in between them based on the center of the owls for continuity. The pattern is so incredibly simple. It goes like this:


OWLGHAN FILLER GRANNY
Make a magic circle.
ch 1
Rnd 1: 8 hdc in magic circle, pull string taught, sl st to join (8 st)
Rnd 2: ch 1 (do NOT turn), 2 hdc in ea. st around, sl st to join, finish off 1st color (16 st)
Rnd 3: with 2nd color, sl st to join, *ch 3, sk next st, sc in following st, repeat from * 6 more times, ch 3, sl st in same st as join (8 ch 3 spaces)
Rnd 4: ch 3 (counts as first dc now and throughout), 2 dc in same sp, ch 2, 3 dc in same sp, *ch 1, 3 dc in next sp, ch 1, 3 dc in next sp, ch 1, 3 dc in same sp, repeat from * 2 more times, ch 1, 3 dc in next sp, ch 1, sl st to join, fasten off 2nd color (4 corners, 4 sides, 36 st)
Rnd 5: with 3rd color, sl st in corner to join, ch 3, 2 dc in same sp, ch 2, 3 dc in same sp, *ch 1, 3 dc in next sp, ch 1, 3 dc in next sp, ch 1, 3 dc in next sp, ch 1, 3 dc in next sp, ch 2, 3 dc in same sp, repeat from * 2 more times, ch 1, 3 dc in next sp, ch 1, 3 dc in next sp, sl st to join, fasten off (48 st)
Rnd 6: with 4th color, sl st in corner to join, ch 3, 2 dc in same sp, ch 2, 3 dc in same sp, *ch 1, 3 dc in next sp, ch 1, 3 dc in next sp, ch 1, 3 dc in next sp, ch 1, 3 dc in next sp, ch 1, 3 dc in next sp, ch 2, 3 dc in same sp, repeat from * 2 more times, ch 1, 3 dc in next sp, ch 1, 3 dc in next sp, ch 1, 3 dc in next sp, sl st to join, fasten off.

After I got going on the squares, I jotted down a graph on the back of a random piece of paper I had lying around the house. When I got all of the squares done, I slip stitched in each stitch along all the columns first to join, and then along each of the rows. I like the slip stitches being on the front so they're more visible. Owls are very good hiders, and they like to hang out in trees. These should reflect that somehow. To me, it looks like they're perched on the white joining, or even peeking out of a hole in a tree. This is what it looks like pre-border:


As always, I hope that you find this post helpful! If you have any questions or concerns, please comment below. Happy stitching! xo

23 September 2013

Magic Circle Tutorial

After posting the original pattern for the Neko Ear Warmers, a friend of mine suggested that I post a tutorial showing how I make my magic circles. (Julie, this is for you, dear.) Although I'm fairly certain I actually cheat when I make them, this is the easiest and fastest way I have figured out how to make the ever-useful magic circle. Plus, it holds up well in the work.

Before we begin, here's another disclaimer: don't judge me for how I hold my yarn. I know it's not technically correct. For whatever reason, though, my pianist fingers are strong enough to hold the yarn taut without wrapping it around my pinky. I just don't think about it. It works for me. Do what works for you.

Anyway, here's your snazzy little photo tutorial:

First, hold your yarn like you're about to cast on.


Keep acting like you're about to cast on by inserting the hook on the left side, and making a loop with the yarn. Hold that X the yarn makes between your middle finger and thumb:


Next, insert your hook into the loop from the front side:


Draw up a loop:


Then, follow the pattern and make the stitches over the 2 strands to the left of your hook. For this example, I'm making one of the ears that belongs on the Neko Ear Warmer.

NOTE: there will be one short end. Make sure that, no matter how many stitches you make, you can always grab the short end! That short end is essential. It's what puts the "magic" in "magic circle." No lie.


Once you've finished your stitches, pull that short end before you sl st to join or continue on to the next round (if working in continual rounds).


Make that hole in the middle of all the stitches as small as your little heart desires, and boom! You're done.


Magic circles are ideal for making hats, and, well, anything that's round except maybe a doily. I wouldn't use a magic circle for a doily. Let's not be silly, now.

By the way, in case you can't tell, YES that is a smaller version of the Neko Ear Warmer. The updated pattern is available for purchase in my Etsy shop.

I hope this tutorial is helpful to you! If you have any questions, concerns, or find an error in the tutorial, PLEASE contact me via e-mail, Facebook message, Etsy message, a comment on here . . . basically, whatever. Just let me know, so that others who use this tutorial won't have any problems.

Happy stitching! xo

12 September 2013

Neko Ear Warmer Reprise

Hey, awesome you!

A week or so ago, I introduced a pattern called, "Neko Ear Warmer."

I would like to announce that the pattern is also available to purchase in the shop!

Remember that right now, 10% of all proceeds benefit the American Heart Association.

Happy stitching! xo

11 September 2013

Bow Bracelet Pattern!

Hello, awesome you! Here is that new pattern I promised to you earlier this week.

 I wear bow ties now. Bow ties are cool.

The pattern is available to purchase here. Remember that 10% of all proceeds benefit the American Heart Association this month!

If you make this pattern, pretty please take pictures and send them to me! You could be featured in the blog!

Happy stitching! xo

06 September 2013

Awareness Bracelet

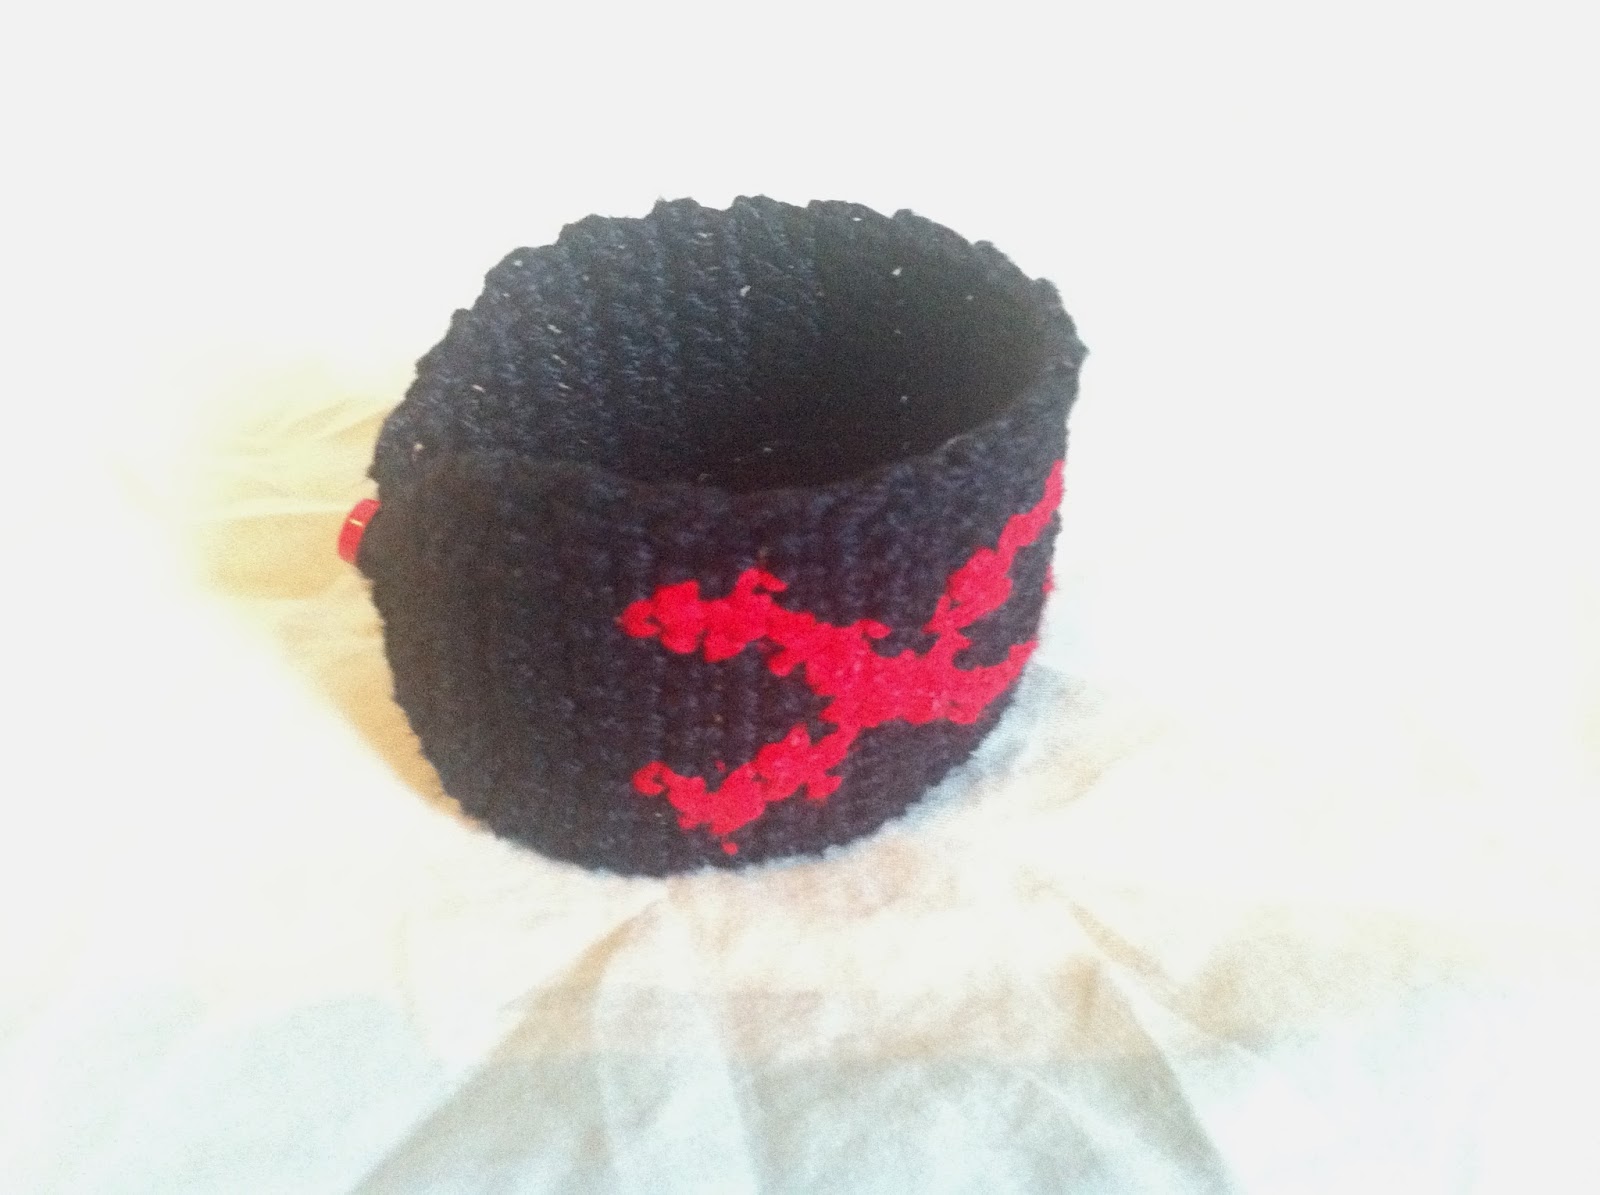
Blue Cloud Crochet is proud to present to you a new pattern! This one is for purchase, instead of for free. Why? Because, as I mentioned in the previous post, a dear friend of mine has passed away. She suffered from a stroke. Other relatives have passed on in the same manner. My grandmother also has suffered from a stroke, and congestive heart failure. So has another dear teacher that taught both myself and my husband. The list of folks I care for who have suffered from heart complications goes on.

Even I have a heart murmur. (Yeah, it's kind of like Laman and Lemuel. Bad Mormon humor. I'm not sorry.) The murmur is minor, but my doctor still keeps a close eye on it because of my family history of heart disease.

The thing is, though, heart disease and stroke are definitely not just problems that affect my family. They run rampant everywhere. Be aware of your body. Go to the doctor for regular check-ups.

The pattern I've created is an awareness bracelet, in memory of my dear friend that recently passed (her name was L.A.). It's also in honor of my Nana, our relatives, our family, as well as our friends who have struggled with heart disease and stroke.

With every purchase of either a bracelet or the pattern for it, 10% will be donated to the American Heart & Stroke Association.

Here are some photos of the finished product:


You can purchase the pattern here, or the item itself here. Again 10% of all proceeds will be donated to the American Heart & Stroke Association. Thank you for your support!

Happy Stitching! xo

29 August 2013

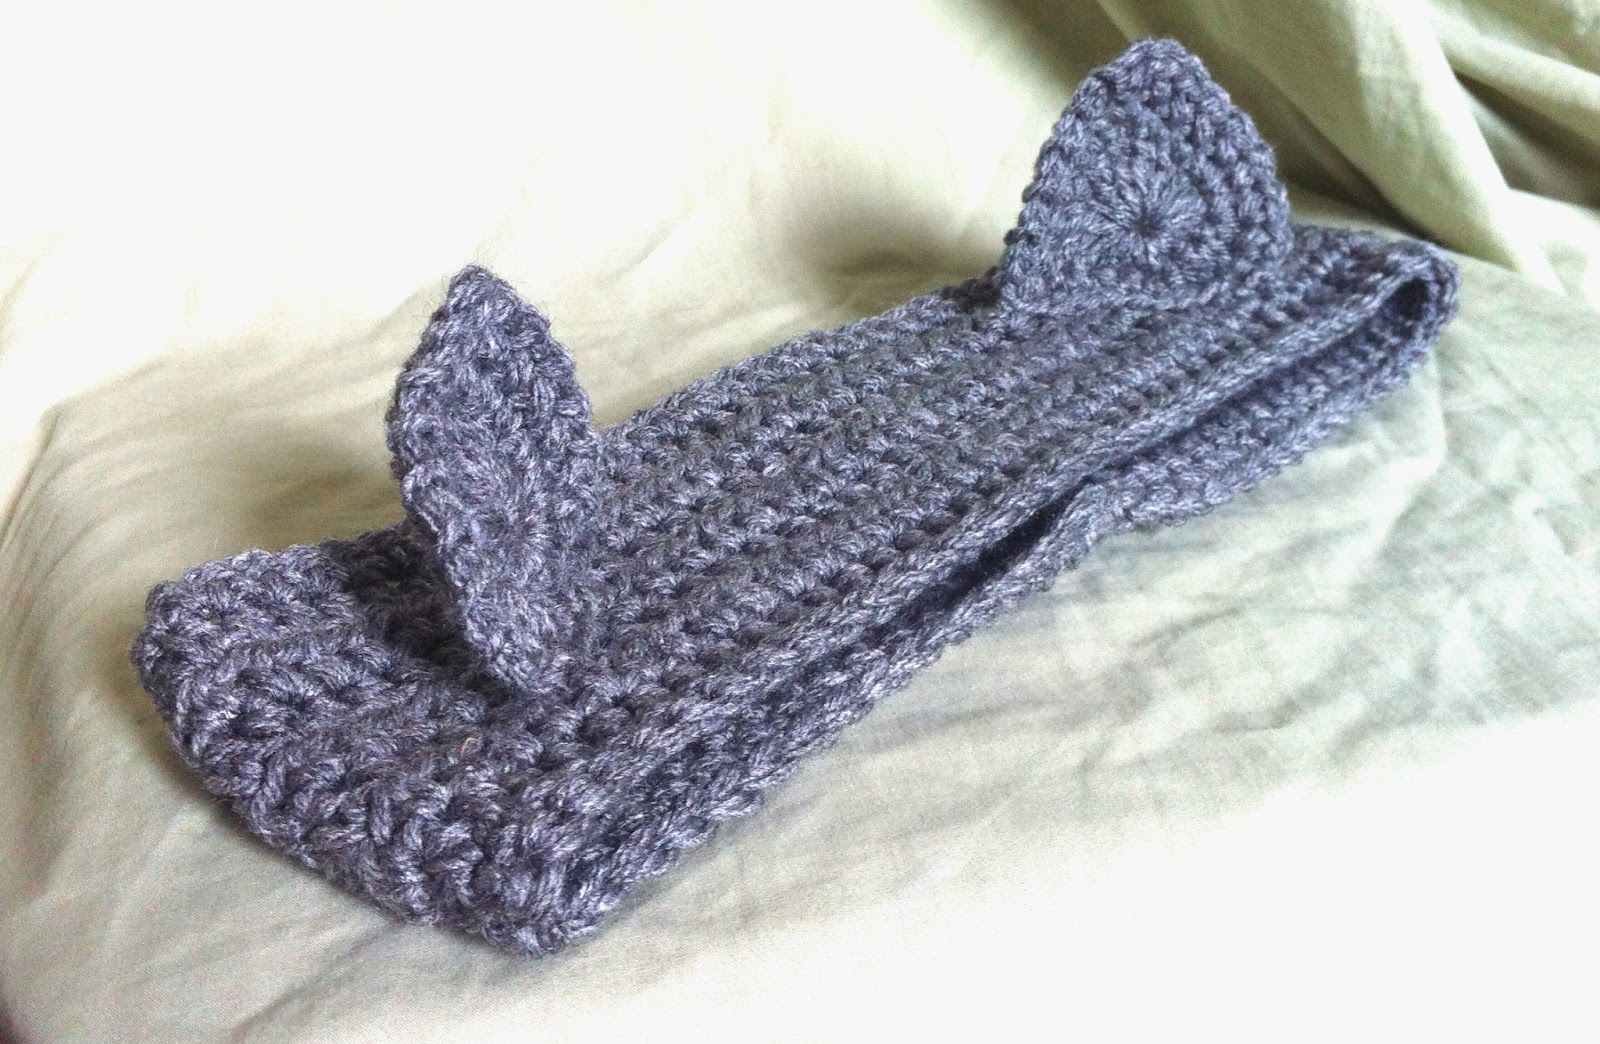
Neko Ear Warmers

My mind, recently, has been on Japan and its culture, as well as on Halloween. My daughter has discovered Sailor Moon, and I have been very happily re-watching all of the episodes with her. The series brings back so many childhood memories for me. My best friend from elementary school is half Japanese. I vividly recall watching episodes of the anime not yet released in the U.S. with her in Japanese, and pretending to be sailor scouts ourselves. She is now in Japan, teaching English to youngsters. I couldn't be happier for her!

In Japan, cats are very beloved. Sailor Moon itself has two cats in it: Luna and Artemis. With Halloween just a bit over two months away, I've had cute crochet hats and ear warmers on the brain. I've already made a pumpkin hat that I'm very proud of. You can see more photos and purchase a custom made beret here. I used an already existing pattern for the hat itself. However, every other little bit it (the stem, leaf, and vine) I stitched together on the fly. Making up those few bits really got my creative juices flowing. The leaf I made for the hat really almost looks like a cat ear, right?


This got me to thinking: why not write my own pattern for a cat-eared ear warmer? I wish I had not attached my ears so far apart, but the pattern is very quick and easy. Enough of me blabbing, though. I got to work and wrote the pattern for the cat-ear ear warmer ("Neko Ear Warmer"). I'm even posting it for free below, just because I want to see how many people actually make it. (If you do, you must send me photos! Please?) If you don't want to go through the trouble, or don't know how to crochet, you can always purchase a custom-made one from my Etsy shop. If you do make the pattern, though, please don't sell it, since it's copyright BlueCloudCrochet. The published pattern is just for fun! Happy stitching! xo


Neko Ear Warmer
Yarn weight: medium worsted (4) (10 ply)
Suggested hook: H (8-5.00 mm)
Notions: tapestry needle
Size: adult
Gauge: 6 hdc = 2 in. 5 rows = 2 in.
Abbreviations:
                Ch = chain
                Sc = single crochet
                Hdc = half double crochet
                Dc = double crochet
                Tr = triple crochet
                Sl st = slip stitch

BAND
Ch. 70
Row 1: hdc in 3rd ch from hook & each ch across
Row 2: ch 2 (counts as 1st hdc) hdc across (69 st.)
Row 3 – 7: repeat row 2
Row 8: ch 1, sc in ea. hdc across. Finish off. (69 st.)
Sl st in foundation ch. Ch 1. Sc across. Finish off, leaving a long tail for sewing. (69 st.)
Fold piece in half, & sew together using tapestry needle.

EARS (make 2)
Make a magic circle, ch 1.
Round 1: in magic circle, 2 sc, 2 hdc, 2 dc, 3 tr, 2 dc, 2 hdc, 2 sc, sl st to join. Pull string from magic circle to tighten to desired tautness.
Rnd 2: ch 1. Do not turn. Sc in same st as join. Sc in next st. 2 sc in next 2 st, sc in next 3 st, 3 sc in next st, sc in next 3 st, 2 sc in next 3 st, sl st to join.
Rnd 3: sl st in next 2 sc, ch 1. Sc in same st, ch 1. [sc, ch 1] 8 times. [sc, ch 1, sc] in next st. ch 1. [sc, ch 1] 7  times. Sc in next st. sl st in next st. finish off, leaving a long tail for sewing.
Attach each ear to desired locations on band.